Showing posts with label Cookies. Show all posts

Sunday, June 25, 2017

Chunky Choco Chip Cookies

   I have decided, after all these years, that I really like cookies!  They are portable yum!  I have made them for our boys, our grandkids, our friends and especially for my husband, John.  I like to keep a good supply in the freezer.  We travel with them because they make a quick and easy snack between meals.    A little bag of them scores me lots of extra points with the neighbors too...  This is my version of a recipe I have seen in the past and I hope it is in the future of many of you, my friends.  Enjoy!


                               Chunky Choco Chip Cookies


1 Cup Blanched Slivered Almonds
1 Cup Craisins, Raisins or other dried fruit chunks
1 Cup Chocolate Chip Chunks
12 oz. Semisweet Chocolate Chips
2 Cups Rolled Oats
2 Cups All-Purpose Flour
1 teaspoon Baking Powder
1 teaspoon Baking Soda
1/2 teaspoon Salt
1/2 Pound (that’s 2 cubes) Unsalted Butter, at room temp.
1 Cup packed Brown Sugar
1 Cup Granulated Sugar
2 Eggs
1 1/2 teaspoons Vanilla Extract

Toast the Almonds in a small saute pan, over medium-low heat, stirring constantly for about 5 to 10 minutes.  Just until they begin to turn brown and have a nutty aroma.  Be careful, they burn quickly!  Cool completely.

In a large bowl, combine the Craisins, Chocolate Chip Chunks, Chocolate Chips and Oats.  Set aside.

Sift together the Flour, Baking Powder, Baking Soda and Salt.  Set aside


In a large mixing bowl, beat the Unsalted Butter until light and creamy.  Add Sugars and beat until fluffy, about 4 minutes.  Add the Eggs and Vanilla and beat until well combined, about 1 minute.  Add the Dry Ingredients to the mixture and beat at low speed until well combined -  less than a minute.  Add the Chocolate Chip Chunks, Chocolate Chips, Craisins, and Blanched Slivered Almonds.  Using a sturdy wooden spoon, mix well by hand, until everything is incorporated.  Use a 1-Tablespoon scoop to measure out cookies onto parchment paper lined cookie sheets, leaving about 2” space between cookies.  Bake for 12 - 14 minutes at 350˚, or until cookies have set and are slightly flattened and light brown.  Cool on sheets 2 minutes, then transfer to racks to cool completely.  Makes 6 dozen cookies.

Wednesday, October 14, 2015

Lemon Bars


If you love the tanginess of fresh lemons, this recipe is for you.  I love the buttery crust and the way the luscious lemon filling forms like magic.  The wonderful thing about these bars is that they do freeze.  Just leave the powdered sugar off until you take them out of the freezer and are ready to serve them.  You will love how easy these are to make.  Enjoy...


                                              Lemon Bars  


Crust:
2 cubes (1/2 pound) Unsalted Butter - at room temperature
1/2 cup Granulated Sugar
2 cups Flour
1/8 teaspoon Salt

With your mixer, cream together the Butter and Sugar until light yellow in color.  Add the Four and Salt and mix - just until combined.  Gather the dough into a ball.  Press Dough into the bottom of a 9”x13”x2” baking pan. Bake the crust for 15 to 20 minutes at 350˚ - until slightly browned.  Cool on wire rack.  

Filling:
6 Extra Large Eggs - at room temperature
3 cups Granulated Sugar
2 Tablespoons Grated Lemon Zest
1 cup Fresh Squeezed Lemon Juice (3 or 4 Large Lemons)
1 cup Flour
 Powdered (Confectioners) Sugar - for dusting after baked

Whisk together the Eggs, Sugar, Lemon Zest, Lemon Juice and Flour.  Pour this mixture over the baked crust.

Bake for 30 to 35 minutes at 350˚ - until the filling is set.  Allow to cool to room temperature.  Cut into bars or triangles.  Dust with Powdered sugar.

If you want to freeze these bars, I suggest leaving the Powdered Sugar off until you remove them from the freezer and are ready to serve them.  
                      

Monday, October 12, 2015

Pineapple Cheesecake Bites


     Are you looking for a yummy cheesecake bar cookie for a special occasion or just an everyday and easy cookie?  Well, I think these fit the bill!  Just be sure you get them covered and into the fridge or into the freezer.  They will disappear fast, they are that yummy.  Enjoy this new recipe from Grammy's kitchen.


                                                   PINEAPPLE CHEESECAKE BITES

Crust:
2 cups Flour
1/2 cup Sugar
1 cup cold Unsalted Butter (that’s 2 cubes or 1/2 pound)
1/8 teaspoon Salt
With your Mixer, combine the Flour, Sugar, Butter and Salt.  Mix until it all comes together into a dough.  Press dough into the bottom of a 9”x13”x2” baking pan (I use my Pyrex baking dish).  Bake the crust in 350˚ oven for 15 to 20 minutes - until crust begins to turn golden brown around the edges.  Cool slightly.

Filling:
16 ounces Cream Cheese - at room temperature
1/2 cup Sugar
1/4 cup Milk
2 x-large Eggs
2 teaspoons Vanilla
16 - 20 ounce can Crushed Pineapple (well drained)
Cream together the Cream Cheese and Sugar.  Add in the Milk, Eggs, Vanilla and Crushed Pineapple. Spread mixture over the baked crust.

Topping:
2 cups Flaked Coconut
2 Tablespoons Unsalted Butter, melted
Combine Coconut and Butter in small bowl.  Sprinkle over Pineapple Filling.  Bake in 350˚ oven for 15 - 20 minutes or just until the coconut begins to brown slightly.  Cool and cut into desired size bars.  I like a small bite size (that’s about 1 1/2” square) and serving them in cupcake papers make a nice presentation.  These do freeze nicely!   

Tuesday, August 26, 2014

Ginger Cookies


I have collected cookie recipes for many years.  I owned and operated a Candy, Gift and Dessert shop for several years when our boys were young.  I purchased the candies and gifts but the desserts were all mine.  I made large cookies - before they were the thing to do.  This was one of my favorites.  Today I want to share this recipe for Ginger Cookies with you and I hope you will enjoy it.


Ginger Cookies

1/2 cup butter or margarine              
1/4 cup dark molasses
1 cup sugar
1 egg
1/4 teaspoon salt
2 teaspoons baking soda
1 teaspoon cinnamon
1 teaspoon allspice
1 teaspoon ginger
2 cups flour
1/4 cup additional sugar

Preheat oven to 350 degrees.  Lightly grease cookie sheet.  Melt butter over low heat, transfer to a medium mixing bowl.  Beat in molasses and 1 cup sugar.  Beat the egg, in small bowl first, then into molasses mixture.  Sift together dry ingredients, then add to wet mixture.  Stir to blend well.  

Form 1 inch balls of dough.  Roll in additional sugar then arrange on cookie sheet.  These will spread so place them about 2 inches apart.  I like to pat them down slightly with my hand, just to get them started.  Bake for 12 to 15 minutes or until firm to touch.  Cool on paper towels.  Makes 2 1/2 to 3 dozen cookies

Tuesday, June 17, 2014

Snickerdoodles

What is more fun than just saying the word Snickerdoodles?   Well, eating them of course!  I made these fun and yummy cookies for my boys when they were growing up.  I always had the ingredients on hand and they are easy to make.  Our oldest son is the cook in his family and he now makes these cookies for his kiddos.  I still make them for my 'forever kid'.  Oh, for anybody who doesn't know, that is my husband John.  He is still a kid at heart and loves cookies.


SNICKERDOODLES

1 cup Vegetable Shortening
1 cup Margarine
3 cups Sugar
4 Eggs
5 1/2 cups Flour
4 teaspoons Cream Of Tartar
2 teaspoon Baking Soda
1/2 teaspoon Salt

Preheat oven to 400˚.  In a large mixing bowl, use your mixer to mix together the Vegetable Shortening, Margarine Sugar and Eggs until creamy.  Blend in all of the dry ingredients, don’t over mix once you have added the flour.  Using a tablespoon or a 1 1/2” ice cream scoop make balls of cookie dough.  Roll each ball in a mixture of 1/2 cup sugar and 1 tablespoon cinnamon.  Place balls 2 inches apart on ungreased baking sheet or parchment paper, flatten the balls of dough slightly, using the palm of your hand.  Bake 8 to 10 minutes.  ( these cookies puff up and then flatten out and have cracks).

Makes 6 dozen cookies


Tuesday, June 10, 2014

Chocolate Chip Cookies

In the late 70's (yes that was a long time ago), I owned and operated a candy store.  I bought my candy and the gift items I sold.  I had a small but efficient kitchen where I baked desserts.  I specialized in cookies, brownies, cheesecake, carrot cake, blackberry cobbler and a few other yummy and sort of old fashioned goodies.  One of the favorites were my chocolate chip cookies.  I made them big and often.  My boys loved when I brought goodies home.  By boys, I mean our 3 sons and my husband, the biggest boy of all.  Very few people don't love chocolate chip cookies.  They are still favorites with all my grandkids.  One of the things I have learned is not to stir things too much after the flour goes in.  I use equal amounts of both margarine and shortening.  And, I don't like to bake the cookies too long.  I try for a nice golden brown bottom on these yummy morsels.  I love walnuts in almost anything but not everyone does, so they are optional.  I hope you enjoy this recipe for one of our family favorites.


                         CHOCOLATE CHIP COOKIES
                                   
1 cup Margarine, at room temperature
1 cup Vegetable Shortening
3 Eggs
1 1/3 cups Sugar
1 1/3 cups Brown sugar
3 teaspoons Vanilla
4 1/2 cups Flour
1 1/2 teaspoons Baking Soda
1 teaspoon Salt
3 cups Chocolate Chips
1 cup Walnuts, chopped - optional

In large mixing bowl, cream together the Margarine, Shortening, Eggs, Sugars, and Vanilla, using an electric mixer.  

With mixer on low speed, slowly add in the Flour, Baking Soda and Salt.  With a spoon, fold in the Chocolate Chips and Walnuts, if you are using them.

Using a tablespoon or a 1 1/2 inch ice cream scoop, drop cookies onto a Pam sprayed baking sheet.  I use the palm of my hand to flatten the cookies just a little.  Bake at 375 degrees for 11 to 13 minutes, or until light brown on the bottom.  Don’t over bake the cookies!  Let the cookies cool for 1-2 minutes on baking sheet and then remove them to paper towels to cool.

Makes 7 dozen cookies - they freeze well but don't last long.  We have a cookie monster that eats ours!

I use the palm of my hand to flatten the cookies just a little.  This gives you nice uniform cookies!


Wednesday, April 2, 2014

Blackberry Mini Cookie Cups

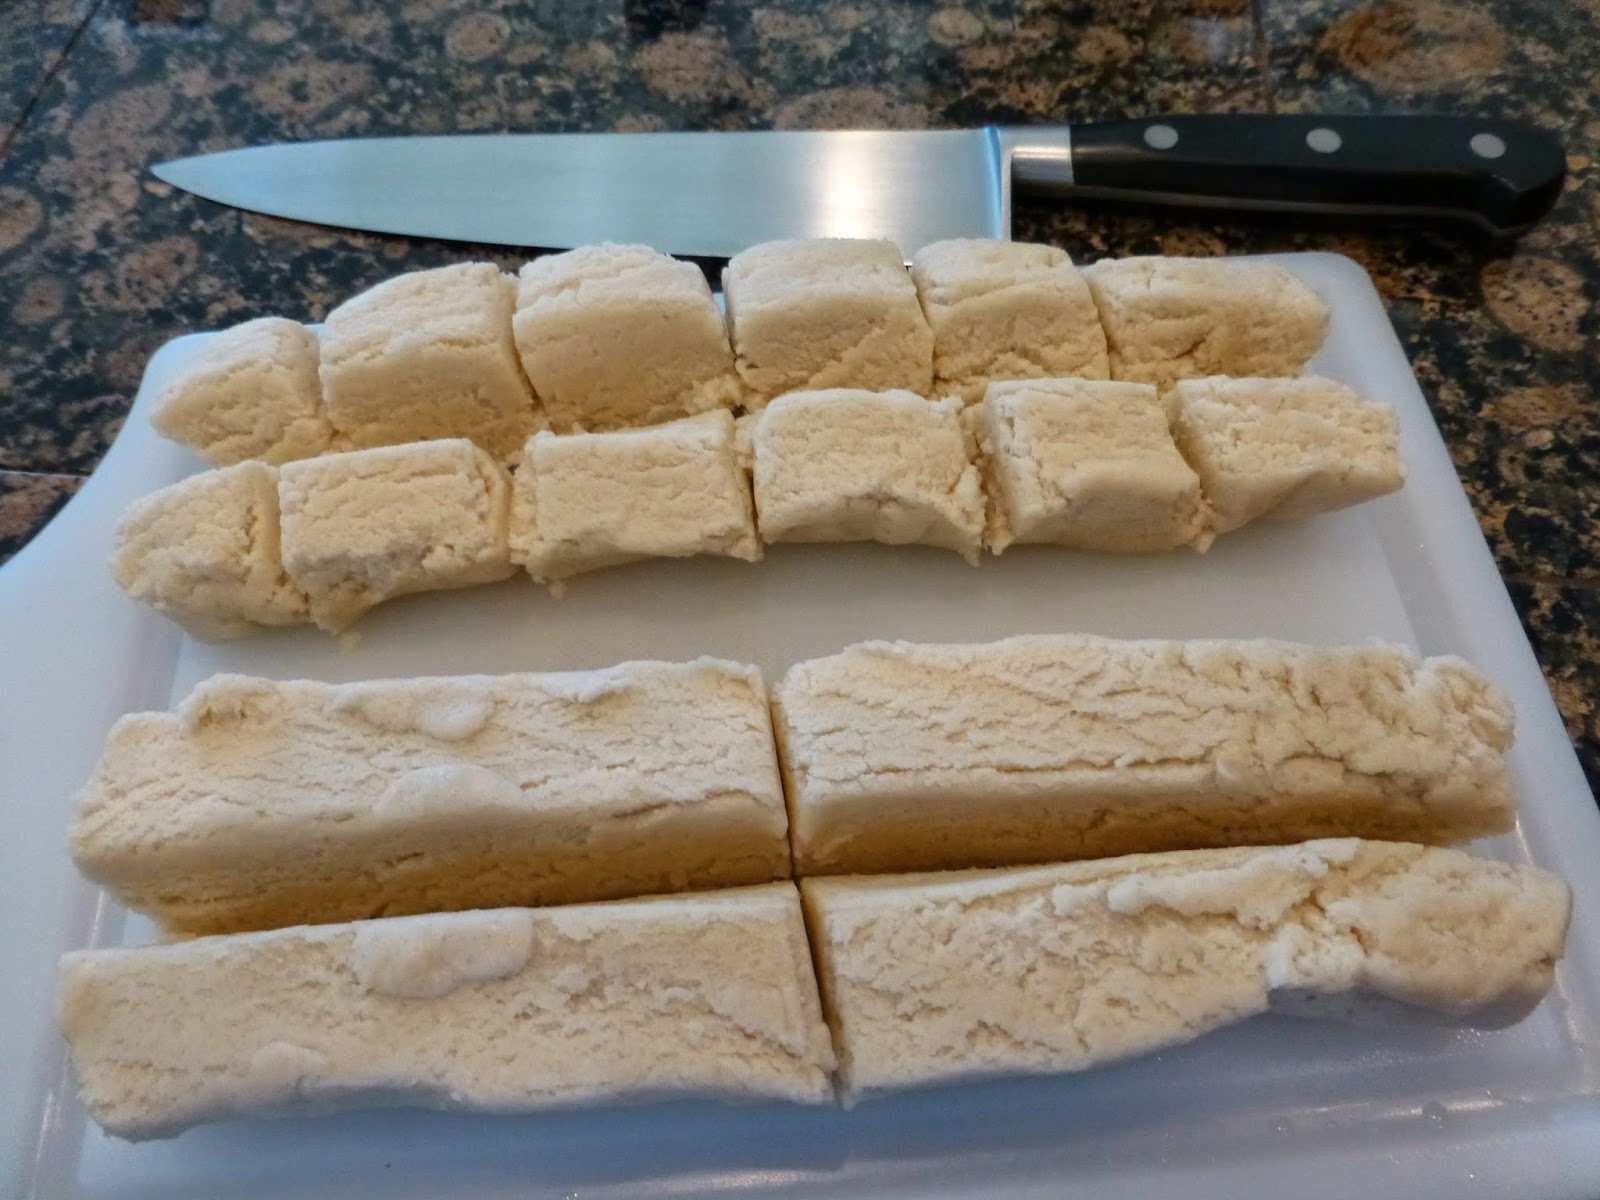
When are you the most adventurous and creative in your cooking?  I find that I am at my best when I am inspired at the market and when I have company coming.  I always check out the berries to see if they look good and go from there.  I saw some beautiful blackberries at Costco and into my basket they went.  I did not know what I would do with them but it had to be dessert and company was coming, the pressure was on!  Then I went to the grocery store to pick up a few non-Costco items and when I saw the pre-made cookie dough I was inspired again.  So, into my basket a roll of sugar cookie dough went.
There was a recipe on the back of the cookie dough package for cookie cups so it would be perfect.  My only concern was - would the berries bleed through the cookie cups..... NO!  They did not!

Well, I decided to do a play on blackberry pie in mini cookie cups.  I pulled out a couple of cookbooks for pie and finally decided to revert back to my Grandma's Blackberry Pie mixture for the berry part of my dessert.  When I was growing up, my Grandma made the best Blackberry Pie.  She just added sugar and a little flour to the wild blackberries that we kids picked.  She made her own pie crust and baked the pie until it was golden and delicious.  She never did write down her recipes so it has been a lot of trials and errors to come up with ingredient amounts.  This is my version of Grandma's Blackberry Pie in Sugar Cookie Cups.  You can make your own recipe for Sugar Cookies or just fudge a little and use the already made roll of sugar cookie dough, like I did.  Since the cookie cups are baked without the berry mixture, I mixed up the pie filling and cooked it on the top of the stove until it was thickened, similar to a jam.  So easy, so pretty and so good!


                                         BLACKBERRY MINI COOKIE CUPS

16 oz. roll pre-made Sugar Cookie Dough
2 teaspoons sugar

2 cups Blackberries
1/2 - 3/4 cup Sugar (taste your berries for tartness, add more sugar if needed)
1 Tablespoon Flour
1/2 teaspoon Butter or Margarine 
1/4 cup Water

Lightly spray 24 mini muffin pan with cooking spray.  Remove the pre-made Cookie Dough from the package.  Divide it into 24 equal pieces (about 1 Tablespoon each) and roll them into balls.  Place one ball into each muffin cup.  Press the Cookie Dough to line each muffin cup.  I used the end of my citrus reamer to help press the dough.  I dipped the end into sugar and lightly pressed.  Then I used my fingers to get the sides to the top of the muffin cup.  Be gentle and don’t make the dough too thin!  Bake at 350˚ until lightly browned about 12 minutes.  Gently press the bottom of the hot cookie cups down into the cup to keep the cup opening as large as possible.  Leave the cookie cups in the tin to cool completely. When cool, gently twist the cookie cups and remove to a plate. 


Pick out 12 of the prettiest berries and cut them in half - the long way.  Place halves cut side down on a paper towel to absorb juice.  These will be used to decorate the top of your filled Cookie Cups.  


In a medium saucepan, combine Black Berries, Sugar (to your taste), Flour, Butter and Water.  Bring to a gentle boil and simmer for about 20 minutes.  Use a fork or potato masher to break down the berries.  Allow this mixture to cool enough so that it begins to thicken. 

I only fill the cookie cups that I am going to use soon and refrigerate the berry mixture separately until I am ready to use it.  Berry mixture will last about 3 days unrefrigerated.   Place a berry half on top of each cookie cup and sprinkle a tiny amount of sugar on top.  So Pretty!

a


Tuesday, June 4, 2013

Oatmeal Raisin Cookies

When we travel, I like to keep healthy snacks in the car to help those long boring miles go by .  Well, oatmeal, eggs, nuts and fruit are healthy - right?  Anyway, we recently made a trip to Las Vegas and those tasty 'healthy cookies' were mighty good and fresh from Grammy's kitchen.  When our boys were growing up, 3 dozen cookies was not enough to last a day so I always doubled this recipe.  They keep well if you put them in zip lock bags and hide them in the freezer.  We now have a monster that lurks in our freezer and eats cookies and ice cream (I think his name is John)!


                                       OATMEAL RAISIN COOKIES
                                       
3/4 cup Shortening
1 1/3 cups Brown Sugar
2 Eggs
1 teaspoon Vanilla
3/4 teaspoon Baking Soda
1/2 teaspoon Salt
1 teaspoon Cinnamon
1/4 teaspoon Nutmeg
1 1/3 cups Flour
2 cups Rolled Oats
2 cup Raisins or Dried Cranberries
1/2 cup chopped Walnuts

In a large mixing bowl, beat together Shortening, Brown Sugar, Eggs and Vanilla until creamy - use an electric mixer. Beat in Baking Soda, Salt, Cinnamon and Nutmeg. With mixer on low, mix in the Flour. Add the Rolled Oats, Raisins and Walnuts and fold them in.  Drop by heaping teaspoon or 1 1/2 inch ice cream scoop onto greased or parchment paper covered cookie sheets.  Bake in 350˚ oven for 12 - 15 minutes - until light golden brown.  Leave cookies on baking sheet for 1 - 2 minutes to cool.  Remove from baking sheet to paper towels to finish cooling.

Makes 3 dozen cookies


Sunday, March 3, 2013

Best Brownies

When you see 'Best' in the title of one of my recipes it means that it is from back in my days of owning my Candy Shop.  I baked a lot of these brownies and they were usually gone by the time the smell of baking chocolate had disappeared.  If they weren't sold or promised, I would feature a special for my Brownie 'n Hot Fudge Sundae.  Now, doesn't that make your jaws ache and your mouth water?
In those days I cut my chocolate from a 10 pound slab and sold it in small chunks.  There were always leftover shavings and these were what I used to make the brownies and I also put them into my Sundae Sauce.  There were leftover 'crumbs' from the English Toffee to sprinkle on top.  Well, that was then and this is now.  I also had a habit of writing recipes with only ingredients and amounts too, who bothered with instructions!  These recipes have been in my pit of a file for over 30 years and I guess it is time to update and put some instructions with them.  I like my brownies undercooked so they are melt in your mouth good, these are not cakey.  Lots of nuts make me happy.  Feel free to leave them out if you're not as nutty as me.  I made a batch of these yesterday.  Most of them are packed into freezer bags to go to grandkids.  I saved a few for John and I to pull out when we need a chocolate fix.


                                          Best Brownies

1 1/2 cups (3 cubes) margarine  (I use Imperial brand)
12 oz. (1 1/2 cups) semi sweet chocolate chips
6 large eggs
3 cups granulated sugar 
3 teaspoons vanilla
1 1/2 cups flour
1/4 cup unsweetened cocoa powder (I use Hershey’s)
1 cup coarse chopped walnuts (optional)
3/4 cup fine chopped walnuts (optional) to sprinkle on top

Prepare a large baking pan by lining it with parchment paper and spreading margarine around the edges of the pan.  I use a 12”x16” cake pan and I just use the margarine wrappers to spread margarine on the pan.  If your pan is a little smaller, your brownies will be a little thicker.  Preheat oven to 350˚.

In a small saucepan combine margarine and chocolate chips.  Melt together, over low heat.  Set aside to cool a little.

With a mixer, combine eggs, sugar and vanilla.  Beat for 1 minute.  Add in the melted margarine and chocolate mixture and then the flour and cocoa powder.  Beat for 1 minute.  With a wooden spoon, stir in the chopped walnuts and pour into prepared pan. Sprinkle the 3/4 cup fine chopped nuts over the top of brownies. 

Bake at 350˚ for 35 minutes.  Check brownies by inserting a toothpick into the center.  You want there to be a little gooey on the toothpick.  These brownies are best when left a little undercooked.  Let brownies cool for chocolate to set up.  Cut into 2’” squares.  

Monday, February 11, 2013

Saltine Cracker Cookies

This recipe is one of those old goodies that everyone used to make.  I was looking through my recipe pit for something sweet, yummy and fast.  Well, this sure fills the bill.  These goodies are sweet, salty, chocolaty and nutty.  I hope you give them a try.  Hide them in the pantry or under the bed so you can have something on hand when the munchies attack.


                                 Saltine Cracker Cookies

2 sleeves (8 ounces) Saltine Crackers
1 cup Butter (2 sticks)
1 cup Brown Sugar, packed
2 cups Chocolate Chips
1/2 cup coarsely chopped Nuts (any kind), nuts are optional

Lightly spray a large jelly roll pan with cooking spray.  Line the pan with a single layer of the saltines (put the salty side down).  This is going to be your crust.

In a medium saucepan, melt the butter and then stir in the brown sugar.  Bring this mixture to a boil.  Stir constantly until the mixture turns a light caramel color (just a few minutes).  Pour the toffee mixture over the crackers, covering them completely. Use a knife to spread it if you need to.  Place the jelly roll pan into a 400˚ oven for about 5 minutes, or until mixture is bubbly.  Remove the pan from the oven, pour the chocolate chips evenly over the top.  When the chips have melted, use a knife to spread the chocolate in an even layer.  Sprinkle the nuts on top and press them down slightly into the chocolate. Put the jelly roll pan into the fridge or freezer for about 20 minutes to harden the chocolate.  Use a knife to lift the sheet of cookies and with your hands, break up into pieces.  Store in an airtight container.  


Monday, December 10, 2012

Chess Pies

My mother in law made these tasty little morsels and they were always a hit.  I remember that every year, at Christmas time, she would bring a box of her home baked cookies to our house.  Our three sons were always excited to see that the Chess Pies were included.  Over the years it became more and more difficult for Grandma Cleo to do all that baking.  Finally, she told me that it was just too much and she hoped no one would mind if she just didn't do it any more.  Of course I told her that it would be ok, but we would always cherish the memory of all her hard work.  I said I would carry on, as best I could, but we would always miss her cookies.  Well, Grandma Cleo, where are you!  How did you do it all?  I made Chess Pies and realized how time consuming they are.  I am writing out this recipe for those in the family that would like to remember Grandma Cleo's Chess Pies and maybe appreciate all that hard work she did.  The original recipe that she gave me had maybe 3 lines of instructions.  I could have filled pages trying to make it clear what you really have to do.  I sure miss you Grandma Cleo.


CHESS PIES

Make your favorite crust for 9” 2 crust pie.  For convenience, I use the pre made, rolled out and boxed one from the supermarket.  Using your rolling pin, roll dough out to about 1/8 to 1/4" thick.  With a 2 3/4” cookie cutter, cut dough into 20 - 24 small tart shells. I use a mini cupcake pan, turned upside down with the dough rounds pressed down and molded over the bottoms.  Prick the bottoms of the tarts with a fork to help keep the shape.   Bake shells at 375˚ for 8 minutes, or until light golden brown.  Cool shells completely before filling.

Filling:

1/2 cup butter
1 cup granulated sugar
3 eggs, beaten
2 tablespoon cream or canned evaporated milk
2 tablespoon water
1 cup raisins
1 cup walnuts, chopped
1/2 teaspoon vanilla

In the top of a double boiler ( or you can put a smaller pot into a larger one with water in the bottom pot - you just want to be sure the water in the bottom pot does not bubble into your tart mixture), melt the butter and sugar. Combine the beaten eggs with the cream and water and whisk them well. Slowly add about 1/4 cup of the melted butter mixture into the egg mixture, stirring constantly, you don’t want to cook the egg.  Now add the egg mixture into the top of the double boiler, along with the raisins.  You need to stir this mixture constantly as you cook it - until it thickens.  This may take 30 minutes or so - don’t give up, it takes time.  Once your mixture is nice and thick, add the walnuts and vanilla.  Mix well!   Fill your baked tart shells, dividing the filling among the tarts.  

These will freeze well but they won’t last long - they are usually eaten!


Monday, December 3, 2012

Sugar Cookies With Jam

I would like to share this special recipe for sugar cookies with you.  Many years ago I was making cookies to sell in my candy, gift and dessert shop.  A very special Aunt Betty sent me a packet of her favorite cookie recipes.  I began making these cookies and my mother in law really liked them.  She was surprised to learn that her sister in law had been the one to give me the recipe.   Of course I was a good daughter in law and gave her the recipe.  I hope that you will try these and that you enjoy them as much as many others have.  I make these at least once a year - usually for Christmas.


                               SUGAR COOKIES 
                                         with jam
                                
1 cup powdered sugar
1 cup granulated sugar
1 cup butter (can be margarine or 1/2 cup of each)
1 cup vegetable oil
2 eggs
2 teaspoons vanilla
5 cups flour
1 teaspoon backing soda
1 teaspoon cream of tarter
1/4 teaspoon salt
1 cup good berry jam

Heat oven to 350 degrees. Mix both sugars and butter until creamy.  Add oil, eggs and vanilla and beat well.  Add the dry ingredients until everything is blended together.

Roll small balls of dough into balls, dip cookie tops into granulated sugar and place on ungreased baking sheets.  I really like to use parchment paper on my baking sheets because it is so easy for cleanup.  Press your thumb into the dough to form a deep indenture - be careful not to make a hole in the bottom.  Fill this with jam or jelly (red berry jams are good).  Bake  for 10 to 12 minutes or until very light in color, don’t bake them too long.  Remove from baking sheet to cool.


For a variation, without the jelly or jam, you can just dip these in colored sugar or sprinkles, then press them down slightly with a glass and bake.

Makes about 7 dozen cookies