Showing posts with label Appetizers and Snacks. Show all posts

Tuesday, August 26, 2014

Caramel Corn


I really do love the holidays but....  sometimes they get so hectic that things I want to do just don't happen.  I sometimes find myself working right up until the last minute and then things don't always turn out right.  One of the ways to get around this is to start early and be prepared.  Cookies, candies, breads and lots of other things can be made and frozen for when you are ready to use them.  Well, then there are the times this just doesn't happen.  Sometimes quick goodies are called for!  Caramel Corn is one of those quick things I like to fix, quick.  It is a treat that most people enjoy but don't always make for themselves.  I surprised a couple of neighbors with this treat on the day before Christmas.  Of course, it is really good on any day - not just holidays.  I also like to make this when the Grandkiddos come to visit.  This recipe was given to me by a good friend many years ago.  I hope you enjoy it as much as my family has, over the years and through the moves....  Oh, I also want to mention that one time I needed a little filler when those Grandkiddos were visiting.  So, I pulled out a pot and made popcorn - from scratch, with real popping corn.  Well, they were amazed because they thought popcorn came in a little bag and was made in the microwave.  They gobbled it up!  So, for you that have never made popcorn from scratch, I am including instructions here.  For those of us that remember the old days, you can over look this part of the post...


                                                        Old Fashioned Popcorn

3 Tablespoons Cooking Oil (Canola or Vegetable Oils are great)
1 cup Popping Corn

In a very large pot, heat the Cooking Oil until it is hot.  I put 3 seeds of popping corn into the pot, put on the lid and shake the pot.  When the 3 seeds have popped you will know that the oil is hot and ready so add the Popping Corn.  Put a tight fitting lid on the pot and shake to keep the seeds moving until it is fully popped.  When the popping is over, your popcorn is ready.  Now, you can dump your popped corn into a large bowl and add butter and salt or eat it plain.  1 cup of popping corn makes approximately 24 cups of popped corn.  This is a very large bowl of popcorn!


                                                            Caramel Corn

24 cups of plain Old Fashioned Popcorn (see recipe above, with no butter or salt added!)

2 cups Brown Sugar, packed
1 cup Margarine (that's 2 cubes)
1/2 cup White Corn Syrup (I use Karo brand)
1 teaspoon Salt
1 teaspoon Butter Flavoring (adds a lot of flavor)
1 teaspoon Baking Soda
1 cup Peanuts or other nuts (optional)

Measure your Popcorn into a large and deep roasting pan. Watch for any unpopped kernals  and pull them out - they can break a tooth!

In a very large saucepan, combine the Brown Sugar, Margarine, Corn Syrup, and Salt.  Bring to a gentle boil and boil for 5 minutes - with no lid.

Remove saucepan from heat and add Butter Flavoring and stir.  Add the Baking Soda and Stir.  This mixture will foam up and then calm back down, this is why you want to use a very large saucepan.  Being very careful, because it is VERY HOT, pour the mixture over the Popped Corn  in the roasting pan.  Add the nuts, if you want them.  Mix everything together to coat the Popcorn.  Bake in 200˚ oven for 1 hour, stirring every 15 minutes - I use a wide spatula for stirring.  Allow to cool and break apart.  Enjoy!  Store in an airtight container (plastic storage bags are great for this) It will last for several days - if you can keep your hands out of it!

If you are giving this Caramel Corn as a gift, fill a nice gift bag or container that seals tight.  Tie with a ribbon and it is ready to go.  Neighbors love it!


Sunday, January 19, 2014

Chex Party Mix

I don't know when Chex cereals came on the market but I know that my Mom made this yummy snack every year.  She would fill a big paper grocery bag with the stuff and we ate on it for days.  We loved the stuff!  Now, I still make it but I change the ingredients around to suit our tastes.  It seems like everyone likes something different.  I like the Wheat Chex, my husband likes the Rice and Corn Chex. My Mom doesn't like cheese crackers so I throw in extra Chex or some Oyster (Soup) crackers.  Everyone will sit and pick out their favorite nuts.  So, you can substitute whatever crunchy snack you like.  I started making the BBQ flavored Mix when I was trying to come up with a totally meatless variety (you know that anchovies are in Worcestershire sauce, don't you?)  These Chex Party Mixes are a favorite of mine to take as hostess gifts too.  Check out the dollar store or craft store in your area for nice gift bags and tie on a pretty ribbon.  Endless possibilities!


                                     CHEX PARTY MIX

NOTE:  You can use any combination of crunchy cereals, crackers etc. that you like in these mixes.  You just need 11 cups total.

TRADITIONAL CHEX MIX:
1/2 cup (1 cube) Margarine
1 1/2 teaspoon Seasoned Salt
1/2 teaspoon Garlic Powder
2 tablespoons Worcestershire Sauce
3 cups Corn Chex                                                                                                                                                                                             3 cups Rice Chex  
3 cups Wheat Chex                                              
1 cup Pretzel Sticks
1 cup Cheese Crackers

Preheat oven to 325 degrees.  In a large 2 - 3 inch deep baking pan (15” x 10 “ size), melt the margarine.  Mix in the Seasoned Salt, Garlic Powder and Worcestershire Sauce.  Add the remaining Crunchy Ingredients and mix well to coat all the pieces.  Bake for one hour, stirring every 15 minutes.  Allow to cool and then store in airtight container.  This mix will keep for at least 1 week.


BBQ PARTY MIX:
1/2 cup (1 cube) Margarine
1/4 cup Barbecue Sauce (your favorite kind)
1 teaspoon Chili Powder
1/2 teaspoon Dried Oregano
1/4 teaspoon Cayenne Pepper
6 cups Chex Cereals (corn, rice or wheat mixed)    
2 cups Corn Chips                                                   
1 cup Cheese Crackers                                                                                                                                           
1 cup Pretzels 
1 cup Mixed Nuts
Preheat oven to 325 degrees.  In a large 2 - 3 inch deep baking pan (15” x 10” size), melt the margarine.  Mix in the Barbecue Sauce and Seasonings.  Add the crunchy ingredients and mix well to coat all pieces.  Bake for one hour, stirring every 15 minutes.  Allow to cool and then store in airtight container. This mix will keep for at least a week! 


Wednesday, November 6, 2013

Easy Winter Salsa

I call this Easy Winter Salsa because it is easy to make and, of course, when those tomatoes are fresh in the summer time they are best.  But, when tomatoes are just simply those 'red things' in the grocery store, there is no point in using them.  I also make this salsa when I am in a hurry and want something as a quick and easy appetizer.  I like to warm the tortilla chips to go with the salsa.  Who doesn't love Chips and Salsa?


                                                  Easy Winter Salsa

2  14 oz. cans Chopped Tomatoes (with juice)
1/3  cup Tomatillos (either canned or slightly boil fresh)
1/3  cup White Onion, chopped
1/3  cup Fresh Cilantro, chopped
4 cloves Garlic
2 or 3 Fresh Jalapenos (seeds removed)
2 Tablespoons Fresh Lime Juice (or you can use red wine vinegar)
1/4  teaspoons Salt

Combine all of the ingredients in a food processor or blender.  Pulse until it is the consistency you like. Taste for flavor and add more Jalapeno if you like it really spicy.
Chill and serve with Tortilla Chips.

Notes: 
  1. If you use canned Tomatillos, the extra can be frozen for another time.
  2. The Tomatillos are optional but I think they add flavor.
  3. I start with 1 Jalapeno at a time because you never know how spicy they are.
  4. I do like the freshness of the Lime Juice versus Red Wine Vinegar. 
  5. You can keep Salsa in the fridge for several days, if you hide it!
  6. I do prefer using a food processor but a blender works.


Thursday, September 12, 2013

Cream Cheese Spreads

I am always looking for quick and easy things to make when company comes calling.  Years ago I would keep purchased cheese spreads in the fridge and crackers in the pantry.  Well, that can be expensive so I decided to make up my own spreads.  Hubby and I both really like sun dried tomatoes, garlic and salmon.  That is how the variations came about.  The spreads will keep in the fridge for 3 to 4 days and they are soooo tasty.  I hope you will give them a try and that you enjoy them.


Sun Dried Tomato Cheese Spread
Basic Cheese Spread with Garlic

                           CREAM CHEESE SPREADS

Basic Spread:
1 8 ounce pkg. Cream Cheese - room temperature (this can be regular or 1/3 less fat)
2 teaspoons White Wine Vinegar 
2 med. cloves Garlic - minced very fine (I use my garlic press or zester)
1/4 teaspoon Sea Salt
1/8 teaspoon Fresh Ground Pepper

Using a mixer, cream the Cream Cheese. Mix in the Vinegar, Garlic, Salt and Pepper. Mix well. Refrigerate and serve chilled with crackers.

Variations:
Sun Dried Tomato Spread:
To one batch of ‘Basic Spread’ add:
2 tablespoons Sun Dried Tomatoes (in oil but drained) - coarse chopped
1 Green Onion - chopped


Salmon Spread:
To one batch of ‘Basic Spread’ add:
1 teaspoon fresh Lemon Juice
1  small can Salmon - drained
2 teaspoon drained Capers - chopped 
1 teaspoons chopped fresh Dill
1 Green Onion - chopped


Thursday, May 30, 2013

Guacamole Supreme

The first time I had guacamole I fell in love again!  Sorry Honey, it's a food thing, it's not a heart thing and always remember that I share the food things.  Even though I grew up in California, it was Northern California and on the coast (Eureka, to be exact).  For those of you that know Eureka and those of you that still live there, we know that avocados do not grow there.  Back in the dark ages, when I was growing up, we didn't have avocados at our house.  I think I lived in Southern California the first time I ate one.  At first I thought it was a little strange, then, by the second time I ate it I was hooked.  Then Guacamole entered my life!  Oh my goodness, I saw stars!  I have loved guacamole ever since.  I make it a lot and it is always gone so I assume that everyone in the world shares my love.  Here is my recipe for Guacamole Supreme (it's better than 'baby love').


                                    Guacamole Supreme

3 Ripe Avocados (to check for ripeness, gently squeeze - it should give a little, but not be mushy)
1/4 cup Onion, finely chopped (red, white or green are good)
1 Roma Tomato, chopped small (about 1/2 cup)
1/4 cup Cilantro, chopped (this is good but optional)
1 Large Jalapeno Pepper, chopped fine (about 2 tablespoons)
         Note: fresh Jalapeno is best but even the pickled ones work   
1 tablespoon fresh Lime Juice
1/8 teaspoon Salt (a pinch)
Black Pepper (half a pinch)
1 or 2 teaspoons Franks Original Hot Sauce (spicy or not so..)

Cut Ripe Avocados in half and remove the seed.  Use a large spoon to scoop out the avocado by running the spoon in along the skin.  Place the avocados into a medium size bowl. Add the remaining ingredients, except for the Hot Sauce.  Use a fork to gently smash the ingredients together.  I like to leave it a bit chunky.  Now, taste the guacamole and add the Hot Sauce to suit your taste.   

Serve with tortilla chips.  


Saturday, March 16, 2013

Asparagus with Wasabi Dip

We have really acquired a taste for Wasabi.  Wasabi is a lot like horseradish, with the bite and the kick.  The flavor can be strong so you want to use it in moderation and I usually mix it with something else.  Fresh Asparagus is always a wonderful treat.  Here, in California, we can usually get good Asparagus year round.  Of course, it is always best in the spring.  This recipe came to me a long time ago and I still use it at gatherings and sometimes I just make a small batch for John and Me.


                               Asparagus Spears with Wasabi Dip

3 pounds small to medium size Asparagus, washed and trimmed
1 cup Mayonnaise
4 teaspoons Soy Sauce
1 1/2 teaspoons granulated Sugar
2 teaspoons fresh Lemon Juice
2 teaspoons Wasabi paste (find this in the Japanese section of most grocery stores)

To trim Asparagus I find the best way is to break the bottom woody end off.  Holding the spear and just snapping the woody end where it wants to break is the best way.  Once you have snapped a couple of spears you can just lay out the rest and use a knife to cut the rest off at the same place on all the spears. It’s nice to have even ends and all the spears close to the same length.

To cook the Asparagus until just crisp tender, I blanch small amounts in a large pot of boiling water for 2 to 3 minutes.   Do not over cook the asparagus, so test one by taking a bite.  Then, remove the spears and put them into very cold water for 2 to 3 minutes to stop the cooking process.  I then gently dry the spears with paper towels.  I wrap the spears in a paper towel and put them into a plastic bag and then chill them.  You can do this the day before you need them.  

For the Dip:  In a small bowl, combine the mayonnaise, soy sauce, sugar and lemon juice and wasabi paste.  Whisk the ingredients together until the sugar is dissolved. Chill the dip over night.  Serve the dip with blanched, cold asparagus spears.


Thursday, January 31, 2013

Cheese Ball with Bacon and Horseradish

I have always liked cheese balls and for some reason I have really been on a kick about mixing different cheeses and flavors.  Last week I told hubby, John, that I wanted something with bacon and horseradish.  We played around a little with flavors and amounts and I hope you enjoy the recipe we created.  I love that cheese balls will keep for several days in the fridge, if you don't eat it all while you are making it!  I have other combinations that I'll post another time.


                        Cheese Ball with Bacon and Horseradish

4 slices of bacon, cut into small pieces, fried crispy and drained  - I like to use a thick cut of good bacon, if you use thin cut, use at least 6 slices.

8 ounces Cream Cheese, at room temperature
2 cups Sharp Cheddar Cheese, grated
2 teaspoons white wine vinegar
1 tablespoon Old Fashioned Horseradish (I use Tulelake Horseradish which is made in Beaverton, Oregon but you can use  your favorite brand)
2 cloves garlic, chopped
3 green onions, chopped - green and white parts 
Crackers of your choice, I like a mild cracker 

Reserve 1 tablespoon of the chopped green onion and 2 tablespoons of the chopped and cooked bacon.  This will be sprinkled over the top of the cheese ball.

In a food processor, combine everything until it is well combined and mostly smooth.  

Now, lay out a square piece of plastic wrap, put the cheese mixture into the center of the square, forming a ball.  Sprinkle the reserved green onion and bacon on the top.  Bring the corners of the wrap up and together.    Your cheese ball will form by itself. Refrigerate for at least one hour for the flavors to blend.  I usually make this a day ahead and it does keep well for several days in the fridge.   Sometimes I make 2 smaller balls and sometimes I make 1 large ball.  This is a very flavorful cheese ball so I serve it with a mild flavored cracker or flat bread. 


Tuesday, January 15, 2013

Stuffed Mushrooms for Happy Hour

You have probably figured out by now that I like foods with lots of yummy flavor.  I like this stuffed mushroom recipe for it's combination of garlicky flavor and the wine really compliments the wheat bread I use.  Add in the soy sauce, butter and cheese and you've got a winner.  If you, for some reason, don't want to use wine in your stuffing, just use a little vegetable or chicken broth to bind the mixture together.  I don't like my mushrooms to be over cooked so if you like yours a little more done, go ahead and cook them another minute.


                  Stuffed Mushrooms for Happy Hour

16 Medium to large Mushrooms (white button or crimini)
3 tablespoons melted margarine
2 cloves garlic, minced
1/2 cup shredded cheese (Jack or cheddar)
2 tablespoons dry white or red wine (I like red)
1 teaspoon soy sauce
1/2 cup bread crumbs (fresh are best!  I use 2-3 slices of fresh wheat bread cut into coarse crumbs.)
1 tablespoon chopped fresh parsley (optional)


Clean mushrooms by wiping them clean with a paper towel.  Remove stems to use later in the recipe.  Coat the mushrooms in melted margarine.   Place them on a foil lined cookie sheet.

Mix together the remaining margarine and the rest of the ingredients. Add in the mushroom stems - finely chopped. 

Loosely fill the mushrooms, pressing the stuffing in lightly.

Broil 6 inches from broiler unit for approximately 3 minutes.  Serve these warm.  Makes 5 servings of 3 each with one left over for the cook to try. Sprinkle the chopped parsley over the top, if you like.

Monday, January 14, 2013

Deviled Eggs

There are not many people who don't like deviled eggs.  They are a simple and a fairly quick appetizer that is sure to please.  I have learned a lot about boiling the eggs in my years of experience.  I have included simple instructions for boiling eggs, along with deviling them.  There are many variations but nothing beats the plain and simple deviled egg!


                                    DEVILED EGGS  

6 boiled eggs 
1/4 teaspoon salt
1/4 teaspoon pepper
1 teaspoon mustard
1/4 cup mayonnaise (or enough to moisten yolks)

Cut boiled and peeled eggs in half. Slip the yolks out of the whites and into a small mixing bowl.  Mash the yolks with a fork or use a grater to break up the yolks. Mix in the rest of the ingredients and mash to blend and be sure you get rid of any lumps.  Taste the mixture to see if it needs more seasoning or mayonnaise.  Using a small spoon, refill whites with egg yolk mixture, heaping it up lightly (or use a large cake decorating tip and pipe the mixture into the whites for a fancier look).  You can sprinkle paprika or fine chopped parsley over the eggs to decorate them.

Note:  If you don’t want to use mayonnaise, try using Italian salad dressing, adding a little at a time so you don’t get the yolks too wet.                         


                                     BOILED EGGS

In a medium saucepan, cover 6 eggs with cold water and bring to a boil.  As soon as the water boils hard, remove saucepan from heat and cover it with a lid .  Let the eggs sit in the hot water, off the heat, and with the lid on for 15 minutes. Pour off the water and crack eggs carefully.  Cover eggs completely with very cold water to finish cooling.  Gently remove the shell from the egg under running water.  

NOTES:  A dark ring around the yolk means you overcooked the egg, don’t worry, it doesn’t change the taste, just the looks.

If, somehow, the yolk is not cooked completely, you can finish cooking the yolks in the microwave by removing the yolks and microwaving just until done.  


Sunday, December 30, 2012

Meatballs with Orange Sauce


Meatballs with Orange Sauce


This is such an easy dish that it is almost (but not quite) embarrassing to give it to you.  I have had lots of people ask for the recipe but I have always evaded giving it out.  Yes, Suz, I am talking about you on my blog.  I do not really like to make meatballs - they are just a bit too tedious for me.  I discovered the Kirkland (from our Costco) Italian Style Beef Meatballs several years ago.  No muss, no fuss and really good!  My kind of product!  I've used them in Spaghetti and casseroles but my favorite way is as an appetizer.  Sometimes I use barbecue sauce - your favorite bottled sauce will be great.  Then, a couple of years ago I came upon an Orange Sauce which is made by Panda Express.  It is so good and tastes like you made it yourself.  I simply put frozen meatballs into my microwavable dish, cover them about half way up the dish with the sauce.  Heat the meatballs by cooking in on high for 3 five minute intervals, stirring after each five minutes, until they are hot all the way through.  Then I cover the meatballs and let them sit in the sauce until I am ready to serve them.  A quick warm up, a few toothpicks and you have a yummy appetizer but they are good over rice too. I really do think easy is sometimes best.  I hope you will give these a try and enjoy another of my little secrets.

Wednesday, December 26, 2012

Simple Appetizers for a gathering of friends.....

We had a beautiful gathering of friends here in our home for our annual Christmas Open House.  John and I worked really hard to clean and  decorate every room in our home. Then, we made 'substantial' appetizers (meaning guests wouldn't have to worry about being hungry for a while) for 35 of our neighbors and good friends. We love doing this but I have been thinking that most people don't have the time and confidence that we do.  I want to share some of the more simple things we had at our party.  They are always big hits and easy enough for anyone to fix.  I hope this will help give you the confidence to enjoy a gathering of your own.


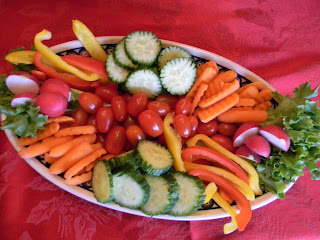
A simple plate of veggies is easy and always quick to fix.  I didn't have a dip with this one but you could put something as easy as Ranch Dressing in a small bowl, add a little dried dill to it and your ready for guests.  Just be sure your plate and veggies are refrigerator cold. 


These two are good sliced ham and turkey from the deli.  I cut the large slices in half and then rolled them and secured them with decorated toothpicks.  They are easy to pick up and nibble on.  Always a big hit for those meat eaters out there.
You can add small bowls of pretzels, nuts or chips and you are all set.  Keep it simple and enjoy your time with friends and family.  Have a very Happy New Year!


Thursday, December 20, 2012

Artichoke Frittata

Several years ago, it seemed like either I or one of my friends had large events going on.  Between school graduations, showers, weddings and such, we were forever cooking and helping each other out.  We had people asking us what our business name was and if we were available.  Well, one thing led to another and we did a little catering.  It was fun but it was also a lot of work.  I want to share one of the recipes that was a popular choice.  I think the original recipe came from a Sunset magazine but who knows how it has changed over the years.  I hope you will give it a try and enjoy it as much as we did.  Oh, our first name initials were P M & S but we always laughed when we told people that we were the PMS Ladies - most were never sure if we were joking or not....


                                ARTICHOKE FRITTATA


2 jars (6 oz. each) marinated artichoke hearts (save 3 tablespoons liquid)

4 green onions, chopped

1 clove garlic, minced
4 large eggs
1/4 cup dry Italian bread crumbs (not seasoned)
1/8 teaspoon each - pepper, oregano and Tabasco
2 cups cheddar cheese, shredded
2 tablespoons minced parsley

Chop artichokes and set aside.  Heat marinade over medium heat.  Add onions and garlic - cook until soft.  In a large mixing bowl, beat eggs with a fork.  Stir in the bread crumbs, pepper, oregano and Tabasco.  Stir in the cheese, parsley, artichokes and the onion mixture.  Pour into a Pam sprayed 7”x11” baking pan.  Bake in 325 degree oven until firm, about 30 minutes.  Let stand in pan just until warm, about 15 minutes.  Cut into 1” squares.  Serve warm, room temperature or cold. 

To reheat, wrap Frittata in foil and heat at 325 degrees for 10 - 12 minutes.

This Frittata keeps for several days in the fridge and it freezes well - just wrap in plastic wrap.

Makes 77  1” pieces.  

Saturday, December 8, 2012

Crackers 'N Herbs

We have finished decorating our house inside and out.  Now we begin getting ready for our Christmas Party in a week.  I have the lists that show the whats and the whens on the makings.  Today I put together a very simple Cracker Snack.  It is pleasantly herbed and it will keep for over a week in a Ziploc bag.  Hubby and I just have to stay out of them!


CRACKERS ‘N HERBS

8 cups Soup or Oyster Crackers
6 cups Fish Crackers
1/2 cup unsalted Butter, melted
1/4 cup Canola or Vegetable Oil
1/2 teaspoon lemon pepper
1/2 teaspoon garlic salt
1/2 teaspoon fresh Rosemary, finely minced
1/2 teaspoon fresh Sage, finely minced
1/2 teaspoon fresh Thyme, finely minced

Preheat oven to 275˚.  Combine the two kinds of crackers in a large baking pan.  In a small sauce pan combine the melted butter and oil with the remaining ingredients.  Pour this mixture over the crackers and toss them well.  Bake for 20 minutes, stirring the mixture every 5 minutes.

These crackers will keep for over a week if stored in an air tight container or a Ziploc bag.