Sunday, December 29, 2013

Some of my favorite Christmas things...

Christmas is over...  All that build up and it's over!  The decorating, the parties, the baking, the gifts and now it's over!  I'm not really ready for this!  I want a few more days to enjoy some of my favorite Christmas things.  It took me years to collect all these prized and cherished possessions, now I want to show some of them to you and maybe you will see why I love them so much.  Please indulge me and forgive me for being so nostalgic.

First I want to show you my front door and the entrance to our home.  This is what people see first so I like it to look warm and inviting.  This was taken on a freaky night that it happened to snow - it almost never snows in our city and for Christmas, how special is that!

Welcome to our home!
Just inside the front door is where Santas can hang their hats!
Then you are greeted by our Mr. Snowman! 
And this is our beautiful Christmas tree.  We needed a skinny one for  the space we have!
The stockings are hung by the chimney, with care!
The guest room is all cheery and ready for guests!
Our Cheery Snowman welcomes anyone who joins him on the back patio!

And now, I guess it's time to say Merry Christmas to All and thank you for sharing some of my favorite things!

Tuesday, November 12, 2013

Baked Lemon Pepper Chicken

This is a quick favorite of ours.  Whenever I say "what sounds good for dinner" John will often say "how about some of that lemon chicken you make".  Well, sometimes it is just what we need to fill the bill.  It's easy, it's tasty and it's not very expensive.  Years ago I did this with chicken wings.  Now I use whatever kind of chicken I have on hand.  Chicken thighs and breasts are both favorites in our house.  If you want to remove the skin, go ahead and do that before you bake it. I like to serve this with a simple salad and rice.


                                 Baked Lemon Pepper Chicken

2 - 4 pieces of Chicken (wings, thighs, legs, breasts or which ever pieces you like)
1 Tablespoon Butter
1 Tablespoon Canola Oil
2 teaspoons Lemon Pepper

Melt Butter with Canola Oil in an ovenproof dish.  Stir the Lemon Pepper into the butter and oil mixture.  Lay the Chicken into the mixture and then flip it over so that you coat both sides of the chicken.  I bake the chicken so that it is skin side up.  Bake in a 350˚ oven for about 30 minutes.  Turn the chicken over and bake for another 15 minutes. Turn the chicken over again and cook for another 5 to 15 minutes. The time will depend on which pieces you are cooking and how thick they are.  To be sure they are done I simply make a small slit on the underside of the chicken to look at the interior of the chicken, next to the bone, or check it with a meat thermometer ( 165 ˚ for chicken).  

Serves 2

Sunday, November 10, 2013

Oven Roasted Yams

John and I both really like yams and they are so good for you.  This is an easy way to fix them in the oven.  They taste so great with anything.  I add the onion but if you don't like onion, just leave it out.  The little sprinkle of chili powder just adds a bit of extra flavor and contrast.  If you are lucky enough to find the small Yams leave those skins on.


                               Oven Roasted Yams

1 large or 3 small Yams (orange sweet potatoes)
1 Onion
1 Tablespoon Butter
1 Tablespoon Canola Oil (any cooking oil will do)
Salt and Pepper to taste
1 - 2 teaspoons Chili Powder

If your Yam is large you should probably peel it, just because the peel can be a little thick.  If your yams are small, the peel should be thin and you won’t have to peel them - just wash them well.  Chunk the Yam and the Onion into bite size pieces.  Line a cookie sheet (one with sides is best) with foil.  Put your yams and onions onto the foil.  Sprinkle them with the Oil, Salt and Pepper and the Chili Powder.  Toss them and add the Butter to the pan (you can melt it - or not).  Bake in a 400˚ oven for 20 minutes.  Stir everything up and put them back in the oven for another 20 minutes.  Check to see if they are done to your liking.  They should be a little caramelized and slightly crunchy.  

Serves 2


Wednesday, November 6, 2013

Easy Winter Salsa

I call this Easy Winter Salsa because it is easy to make and, of course, when those tomatoes are fresh in the summer time they are best.  But, when tomatoes are just simply those 'red things' in the grocery store, there is no point in using them.  I also make this salsa when I am in a hurry and want something as a quick and easy appetizer.  I like to warm the tortilla chips to go with the salsa.  Who doesn't love Chips and Salsa?


                                                  Easy Winter Salsa

2  14 oz. cans Chopped Tomatoes (with juice)
1/3  cup Tomatillos (either canned or slightly boil fresh)
1/3  cup White Onion, chopped
1/3  cup Fresh Cilantro, chopped
4 cloves Garlic
2 or 3 Fresh Jalapenos (seeds removed)
2 Tablespoons Fresh Lime Juice (or you can use red wine vinegar)
1/4  teaspoons Salt

Combine all of the ingredients in a food processor or blender.  Pulse until it is the consistency you like. Taste for flavor and add more Jalapeno if you like it really spicy.
Chill and serve with Tortilla Chips.

Notes: 
  1. If you use canned Tomatillos, the extra can be frozen for another time.
  2. The Tomatillos are optional but I think they add flavor.
  3. I start with 1 Jalapeno at a time because you never know how spicy they are.
  4. I do like the freshness of the Lime Juice versus Red Wine Vinegar. 
  5. You can keep Salsa in the fridge for several days, if you hide it!
  6. I do prefer using a food processor but a blender works.


Saturday, October 26, 2013

Cabbage Tamales - Unrolled

I remember going to my husband's parent's home for dinner and walking in to the smell of cooked cabbage and garlic.  Wow, what memories.  His mom, Cleo, made the most wonderful little morsels and called them Cabbage Tamales.  They were such a family favorite and she labored for hours to roll them and she cooked them all day.  They were devoured so quickly.  It seemed like there were never enough.  Well, I made them and first of all, they were a lot of work and second, my boys didn't like them.  So, now, after years of thinking about those little morsels, I made them again.  Well, they are still  a lot of work so I came up with this recipe that is so much easier and quicker.  It may not be those little tamales that were loved so much but it is the flavor and that wonderful aroma fills the house with memories.  Sorry, Mom Cleo, you would love this shortcut casserole, or maybe not.

Try my shortcut casserole recipe and see what you think.  Of course, you have to like cooked cabbage, garlic and tomatoes.  The leftovers are so good, maybe better than the first overs.


                  Cabbage Tamales Unwrapped

1 lb. lean Ground Beef
3/4 cup uncooked White Rice
1 clove Garlic, chopped fine
1/2 teaspoon Salt
1/4 teaspoon Black Pepper
Cooking Spray
1 small head Cabbage, chopped into 1” pieces
4 cloves Garlic, sliced thin
1 large (46 oz.) can Tomato Juice (or try V-8)

In a med. mixing bowl, combine the Ground Beef, uncooked Rice, chopped Garlic and Salt and Black Pepper.  I use my hands to do this and then I form the mixture into small meatballs, about 1” in diameter.

Spray a large casserole dish with Cooking Spray.  Put a layer of chopped Cabbage into casserole dish.  Sprinkle a layer of thin sliced Garlic over the Cabbage.  Lay the meat and rice meatballs on top and add the last of the chopped Cabbage.  Now pour the Tomato Juice over the top.

Cover the entire casserole with a lid or foil.  Bake in 350˚ oven for 1 hour.  Remove the foil and continue baking for another 1/2 hour.  You want the rice and cabbage done and not too much juice.  Serve with toasted garlic bread.  This casserole is very good as leftovers.   

Serves 6


Thursday, October 24, 2013

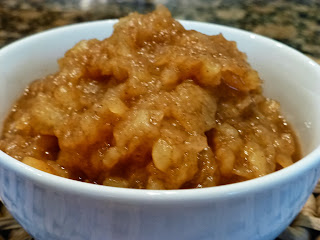
Grammy's Homemade Applesauce

When I think of the fresh local apples being picked in our area, I think of homemade applesauce.   I especially like to serve fresh applesauce as a side dish with pork.  I make it in small batches because it's so easy to make.  If you have lots of apples and want lots of applesauce, go ahead and make a big batch.  It is so good in applesauce cakes and cookies.  You can also just eat it for a simple dessert.

It's hard to say there is an exact recipe for applesauce because there are so many things to consider.  First you have the kinds of apples, there are so many.  I try to use local produce when I can and I choose a nice crisp and semi-tart apple.  Some apples are not really juicy so you may need a little more water to help break them down.  Some are really tart so you may need to add a little more sugar to suit your taste.  I like mine with chunks, you may like yours smooth.  I usually use granulated sugar but you might like to try brown sugar.  I like cinnamon in mine but that is strictly optional.  Do try this simple and old fashioned applesauce.  You will be surprised at how easy and delicious it is.


 Grammy’s Homemade Applesauce

4 - 5 Apples, your choice of kind (I like crisp and tart and flavorful, like Gala, Fuji, or Gravenstein. Free is best but cheap is the next choice.

1/4  to 1/2 cup Water 
1 tablespoon Lemon Juice 
1 or 2 tablespoons Sugar  (I use granulated sugar but brown sugar is good too)
1/4 or 1/2 teaspoon Cinnamon, optional
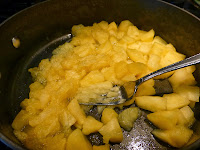
Wash, quarter, core and peel apples.  I like to cook the apples in a deep flat pan, so I will be able to smash them in the pan with a fork when they are done. Add the Water to the pan and cover with a lid.  Cook on medium heat for about 10 minutes or until the apples have softened.  
Remove the lid and begin smashing the apples with a fork, I like mine chunky. You can use a potato masher if you like.  Add in the Sugar, to taste, you make it as sweet or tart as you like. Add in the Cinnamon, also to your taste.   

Makes 4 servings


Choose your apples.


Quarter apples.


Peel and core apples.

Carve faces in apples.
(Just for fun!) 


Cut apples into small
pieces. 

Add water and lemon
juice.  Cover and cook.


Smash with fork.  Add
sugar and cinnamon.

A yummy bowl of sauce.


Monday, October 14, 2013

Pasta and Bean Soup

Wow, I can't believe it's October already and Fall weather is upon us. Actually, it's one of my favorite times of the year.  It has cooled down at night and the days are usually very comfortable.  We have a little wind blowing through our trees but that is just enough reminder that soon those trees will be bare and ready for winter.  In my kitchen it is time to get out those soup and comfort food recipes.  When we can make it over to Olive Garden, John and I both really like their Pasta Fagioli (Pasta and Bean) soup.  This is my version of this really comforting and filling soup.


                                                  Pasta and Bean Soup

1 lb. lean Ground Beef
2 teaspoons Canola Oil
1 small Onion, chopped fine
1 large Carrot, chopped
1 stalk Celery, chopped
3 cloves Garlic, chopped fine
28 oz. canned Diced Tomatoes
16 oz. canned Tomato Sauce
3 cups Beef Broth (I use Better Than Bouillon brand)
1 15 oz. can White Beans, drained
1 15 oz. can Red Kidney Beans, drained
3/4 teaspoon Salt
1 teaspoon dried Oregano
1 teaspoon dried Basil
1/2 teaspoon dried Thyme
1/2 teaspoon Black Pepper
1 small fresh Zucchini, chopped small (optional)
1/4 cup uncooked small Elbow Pasta (or any shape small pasta)

Bring a large pot to medium heat with the Oil in it.  Break up the Ground Beef and season it with salt and pepper, cook it in the oil until it all turns brown.  Drain off any excess oil.  Add the Onion, Carrot, Celery and Garlic and cook for about 10 minutes.  Add in the Diced Tomatoes, Tomato Sauce, Beef Broth, White Beans and Kidney Beans.  Season with Salt, Oregano, Basil, Thyme and Black Pepper.  Cook on low heat for about 30 minutes. Add the chopped Zucchini to the soup and continue cooking for another 10 minutes.   

In a separate saucepan, bring salted water to boil and cook the Pasta until it is just al dente (barely cooked).  Saving the cooking water, add the Pasta to the soup and cook for another 10 minutes. You can add some of the saved cooking water to thin the soup if you like it thinner.  Serve with crusty French Bread. 

Makes 8 - 10 servings

Notes:  If you want more broth, add extra Beef Broth
             Add more broth each time you reheat leftovers
            This Soup keeps well in the fridge and also freezes well